Table Of Content
Learning how to use this technique will make such a difference to the items that you’re able to create. Learning how to print and cut with Cricut ensures you get precise images and patterns every time. Now you can see that it’s a single flattened image designated as Print then Cut.
What is the Cricut Print then Cut Size Limit?
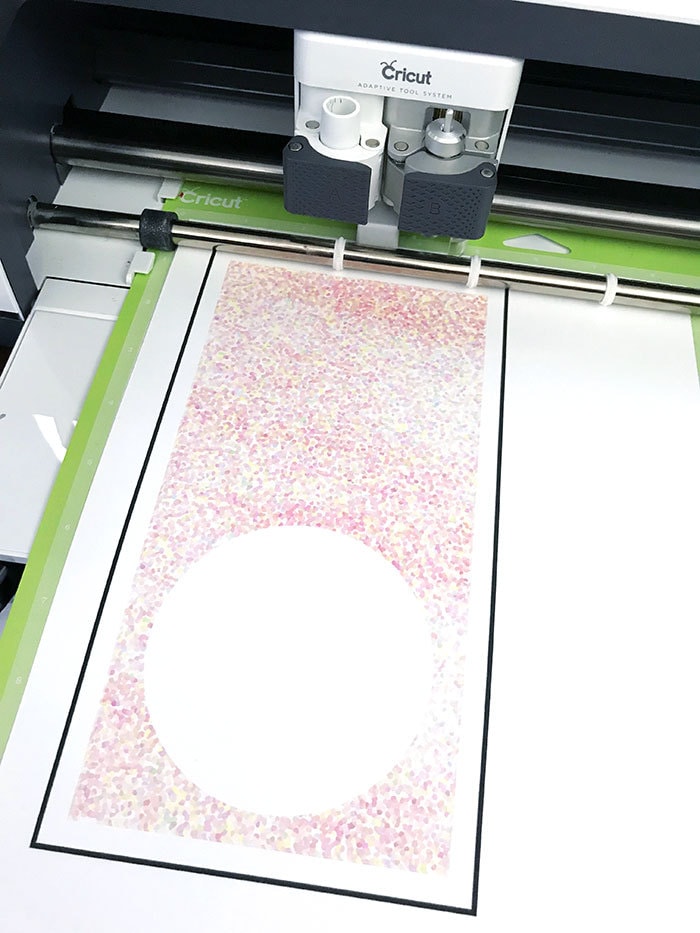
After your design has printed, set it aside until the ink is completely dry to avoid any smears during the cutting process. Trim away the black marks using scissors, leaving some white space above and below the images. Using a paper trimmer, trim along the straight seam line sides of each half. Make sure there is no white showing to the side of the design's seam. Click "Make it." On the Prepare screen, make sure the Material size is 8.5" x 11" and "Mirror" is toggled on. If the images are very close to the black registration marks, you can drag them to the center a bit.
When to use Flatten to Print and Cut with your Cricut
Make sure the correct machine is selected, then click "Make It" in the upper right corner. In the Layers Panel, hide one of the frames by clicking on the eye shape to the right in the layer. Since PNG files are so large when they are uploaded we need to change the size.

Print and cut using a PNG file
DIY Taylor Swift Inspired T-shirt: Easy Instructions - Better Homes and Gardens
DIY Taylor Swift Inspired T-shirt: Easy Instructions.
Posted: Thu, 15 Feb 2024 08:00:00 GMT [source]
Now we'll create the seam and a slight overlap by splitting the layers. I will start with the left hand side of the images. We need to Slice each of these layers into two pieces with a bit of overlap to match the seams during the transfer. You can use the Canvas grid to line up the center of your image. With all the layers selected, determine the distance to the middle, either vertically or horizontally. Drag the layers so the middle aligns with a grid line.
Make sure your image is lined up right
With Cricut Design Space, users can upload their images and fonts or use the pre-loaded photos and fonts to create their designs. Once the design is complete, it can be saved and sent to a Cricut cutting machine to be cut out. Cricut Design Space makes it easy to create custom designs for Cricut cutting machines. Users can quickly create their design, save it, and send it to a Cricut cutting machine with its user-friendly interface.
If you calibrate after printing a sheet, the cut lines might not match up anymore! See my Print then Cut printer calibration video for more information. Excited to try out the expanded Cricut Print and Cut Size?
Spring Sublimation Wind Spinner Designs: Free Bundle

It will cut as a square, but in many cases that’s better than cutting around all the individual pieces. There may be some instances where this is what you want, but generally you’d probably want this to cut as a single image with all of the layers on top of one another. Using this method, your image retains all its layers, which you can see because the outlines around each piece are now gone. You can still go in and change the color of your layers if you desire, too. You will need to run Print then Cut through Cricut Design Space because the software will add black “registration marks” around the image, signifying where to cut. I’ll guide you through the process of printing without cutting, and we’ll explore some helpful tips and troubleshooting advice along the way.
You’ll see a full description of what each option means but since this is a Print Then Cut image you’re going to want the best image possible so we recommend selecting Complex. The first thing you need to do is to upload your image to your canvas. You can upload JPEG, BMP, PNG, HEIC, SVG and DXF image files. You can either click Browse or, if you have your image handy, just drop it in.
Select all four layers and Select "Center" in the "Align" menu. Using the t-shirt guide, find where you'd like to place the image. Place a clean sheet of white cardstock in between the front and back of the t-shirt.
I turned off the bleed, but it doesn’t matter because the edge of this design is white. Once you align the stickers and the rectangle, keep the selection, click “Duplicate” on top of the layers panel, and move the copy to the right. As you can see, both designs look identical, but after the machine is done cutting the rectangle that was “Flattened,” it performed only one cut, the outside of the rectangle. On the other hand, the ” Attached ” design cut the rectangle and the letters inside it. Get ready because today’s tutorial is full of juicy tricks.
I always used “Flatten”; therefore, I couldn’t do stickers with the background because Cricut would’ve cut a rectangle. The sticker paper I’m using is relatively thin, so I selected the option “Copy Paper – 20 lb” and set the pressure for more. We’re not going to print that layer; however, you need to click on “I’ve already printed” so you can move forward. Before changing any operation or flattening, select the group on the “Cut Layer” and click on “Weld” at the bottom of the layers panel to have a simple layer. If you like a “bleeding” effect on your stickers, let me show you how to proceed.


No comments:
Post a Comment